Articulating Robotic Hand

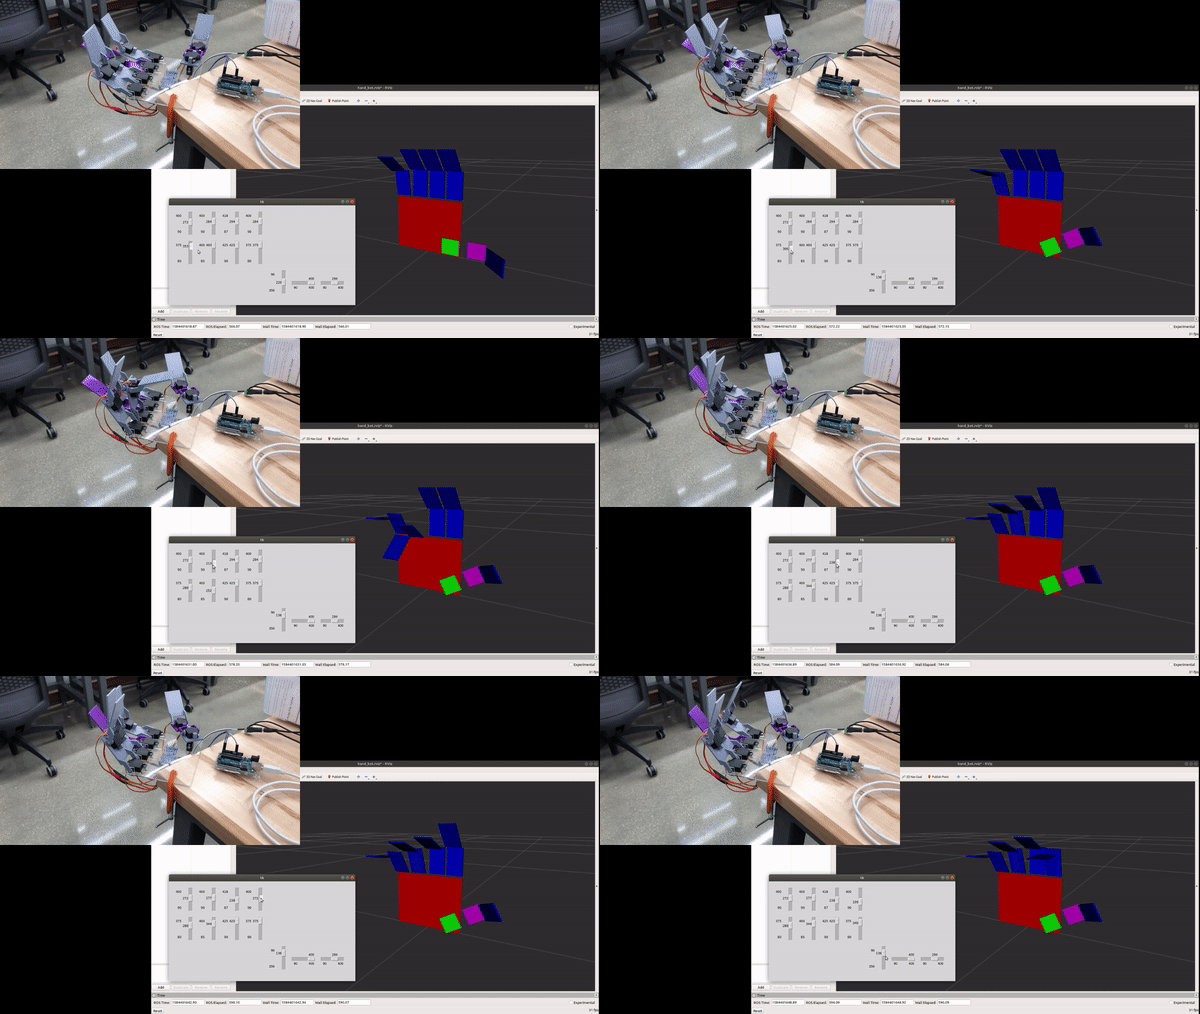
One of my personal robotics interests is the development of devices to replace or augment injured body parts. With that in mind, I designed and built this articulating hand that can be controlled through a GUI on an attached computer. The hand itself is controlled by an Arduino Uno, which communicates with the rest of the project through the Robot Operating System (ROS). While it’s not integrated with a person’s nervous system (yet…), it functions very similarly to a real human hand. Check back for design updates and increased functionality!
Project Files
This GitHub repository contains the project’s technical details, as well as information about how to build and operate your own version of this robot.
Design
I have a lot of experience with additive manufacturing, so I designed the hand to be fully built using a 3D printer. The first version uses a laser-cut palm for quick production, but I’ll be replacing it with a 3D printed piece. Each finger has two joints, while the thumb has three. Each joint is controlled by a servo motor, which emulates the rotational action of the biological finger joint. To save space and reduce hardware requirements, each finger segment attaches directly to the servo knob via press-fit.
Electromechanical Control
The servo motors are controlled by an Adafruit driver board connected to an Arduino Uno, which allows me to control up to 16 motors at a time. My robot only has 11 motors, but this is a huge step up from using the Arduino, which by itself can only control 2 servos. The board uses pulse-width modulation to control the voltage supplied to the servos; the voltage level determines servo position.
ROS Integration
ROS includes software that allows you to operate the Arduino as a node, or a building block in your ROS package. The GitHub repository I linked above has a map of the different nodes that this project contains. Nodes communicate over topics; the computer sends messages over a specific topic to tell the Arduino to move the robot’s fingers.
I also used the ROS package RViz to visualize and simulate the robot while the package is running. That way, you can explore the software components of the project without any of the hardware! It’s much less exciting, but it works without having to buy, build, or assemble anything.
User Interface
I used the Python Tkinter toolkit to build the user-control GUI, in which each joint is represented by a slider bar. This gives the user more intuitive control over the robot; rather than guessing where you want the robot to be and typing in a number, you can click and drag the fingers to the correct position.